Getting setup with Members in Ghost involves a few steps such as connecting a Stripe account, so that you can make money, ensuring your site's theme is ready to go, and setting up email.
Following the steps below will help you to get set up in no time!
Turn the members feature on
Once your site is up and running, log in to your publication admin area as the site owner and navigate to the Labs screen. In here you'll be able to turn members on using the toggle button. Only site owners are able to perform this action.
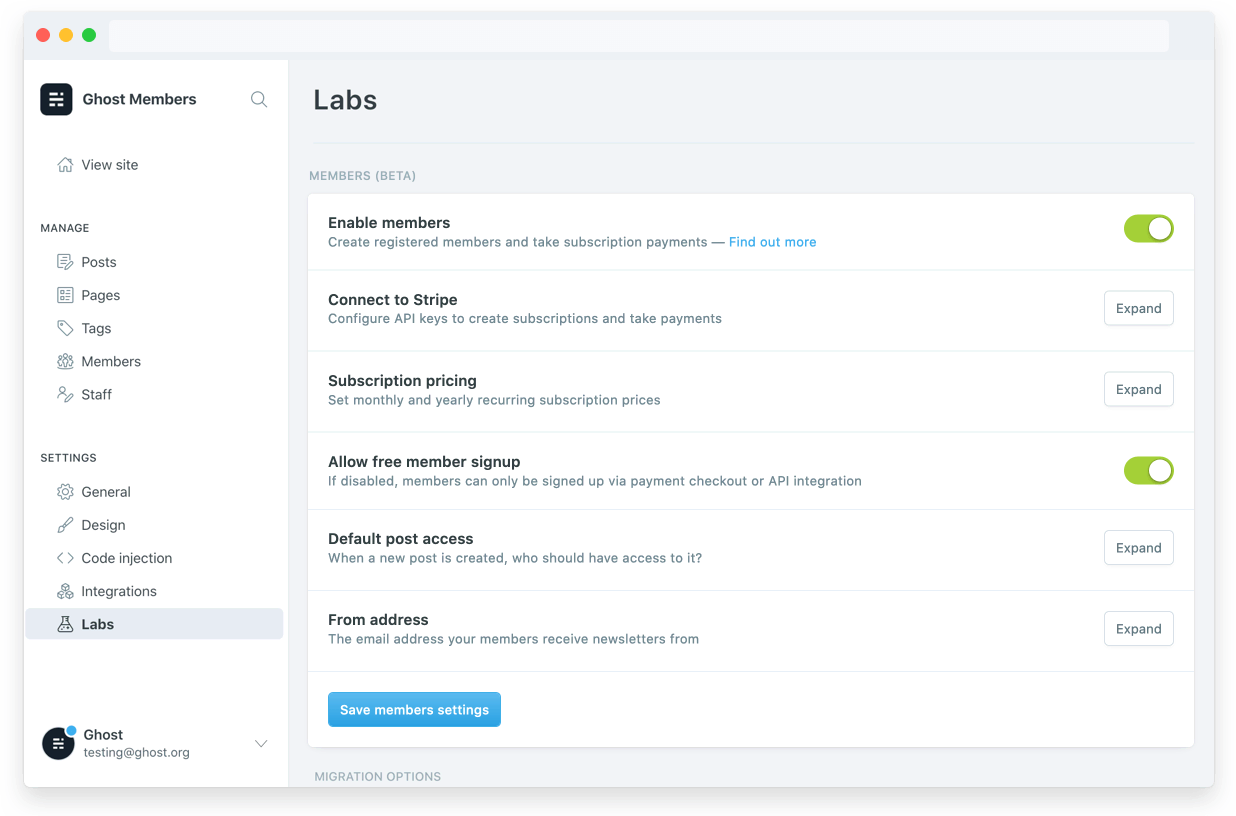
Once this is done, you've successfully enabled all members features within your Ghost publication 🎉
Connect a Stripe account
If you intend to use Ghost to take payments from your readers, follow these steps to connect a Stripe account.
Create an account
Stripe is our exclusive payments partner. If you don't already have a Stripe account you can create one here. If you have an existing Stripe account for a different type of business, we recommended logging in to Stripe and creating a new account from the Stripe dashboard to use for your Ghost integration. If you're migrating from other platforms such as Substack, you'll need to use the same Stripe account.
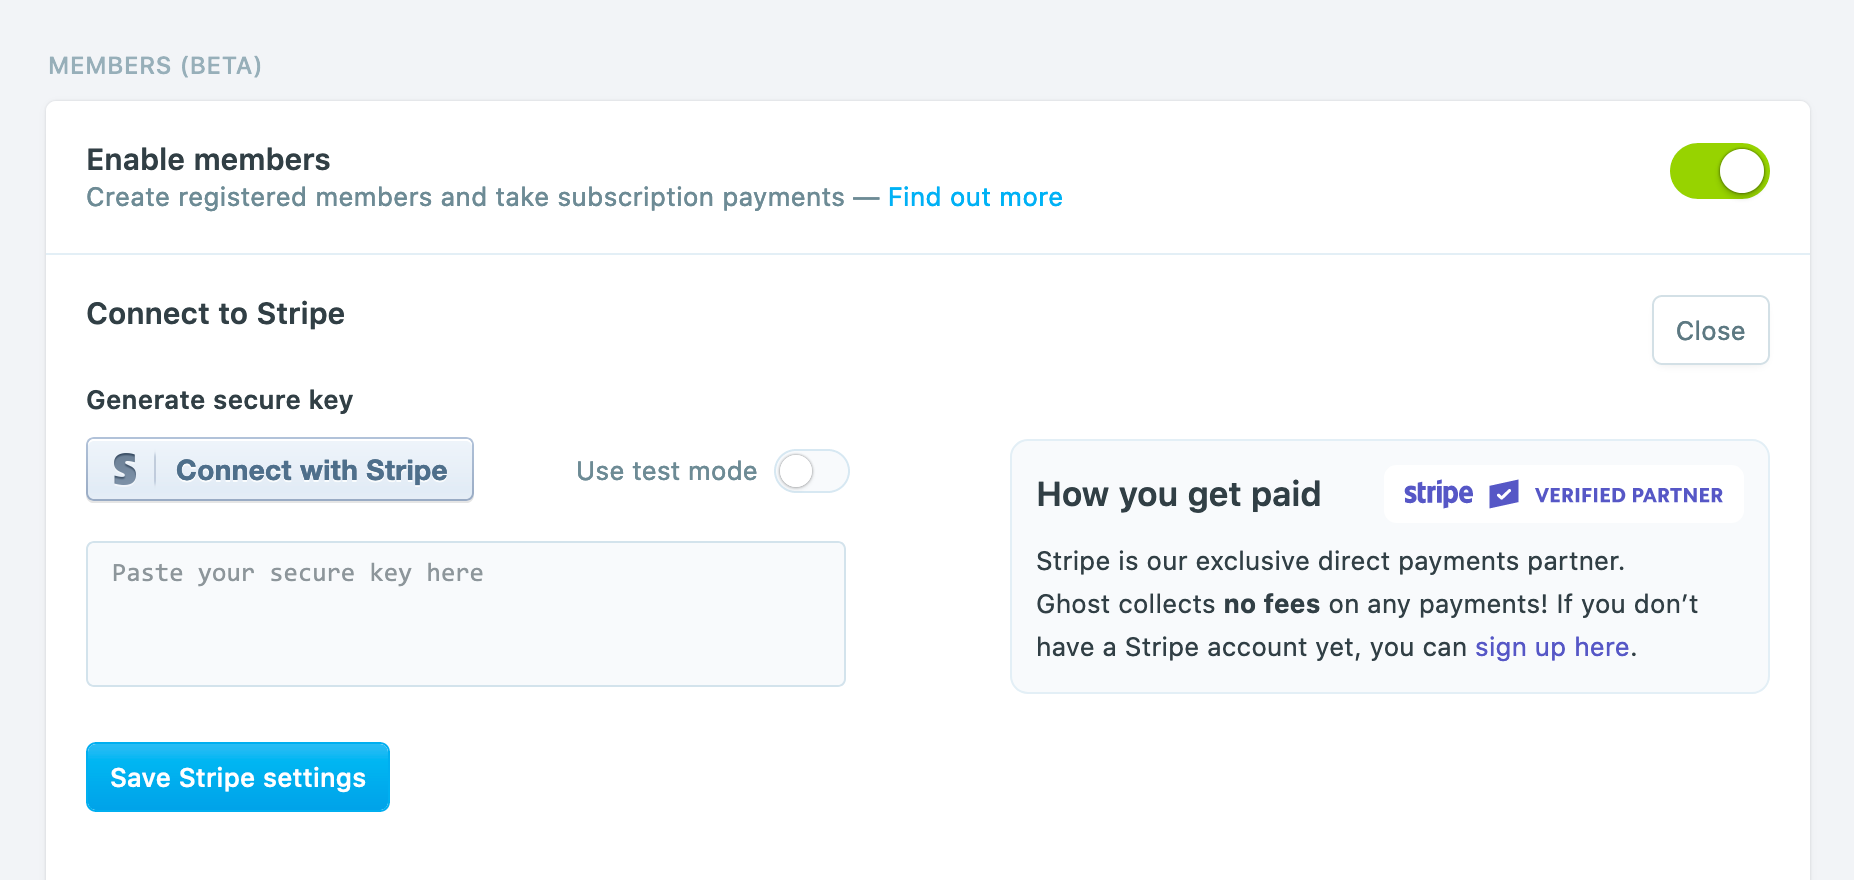
Connect to Stripe
Open your Stripe settings in Labs to create a connection between your Ghost website and your Stripe account. Click on the Connect to Stripe button to begin the process.
Next you will be taken to Stripe.com to confirm you'd like to connect your site:
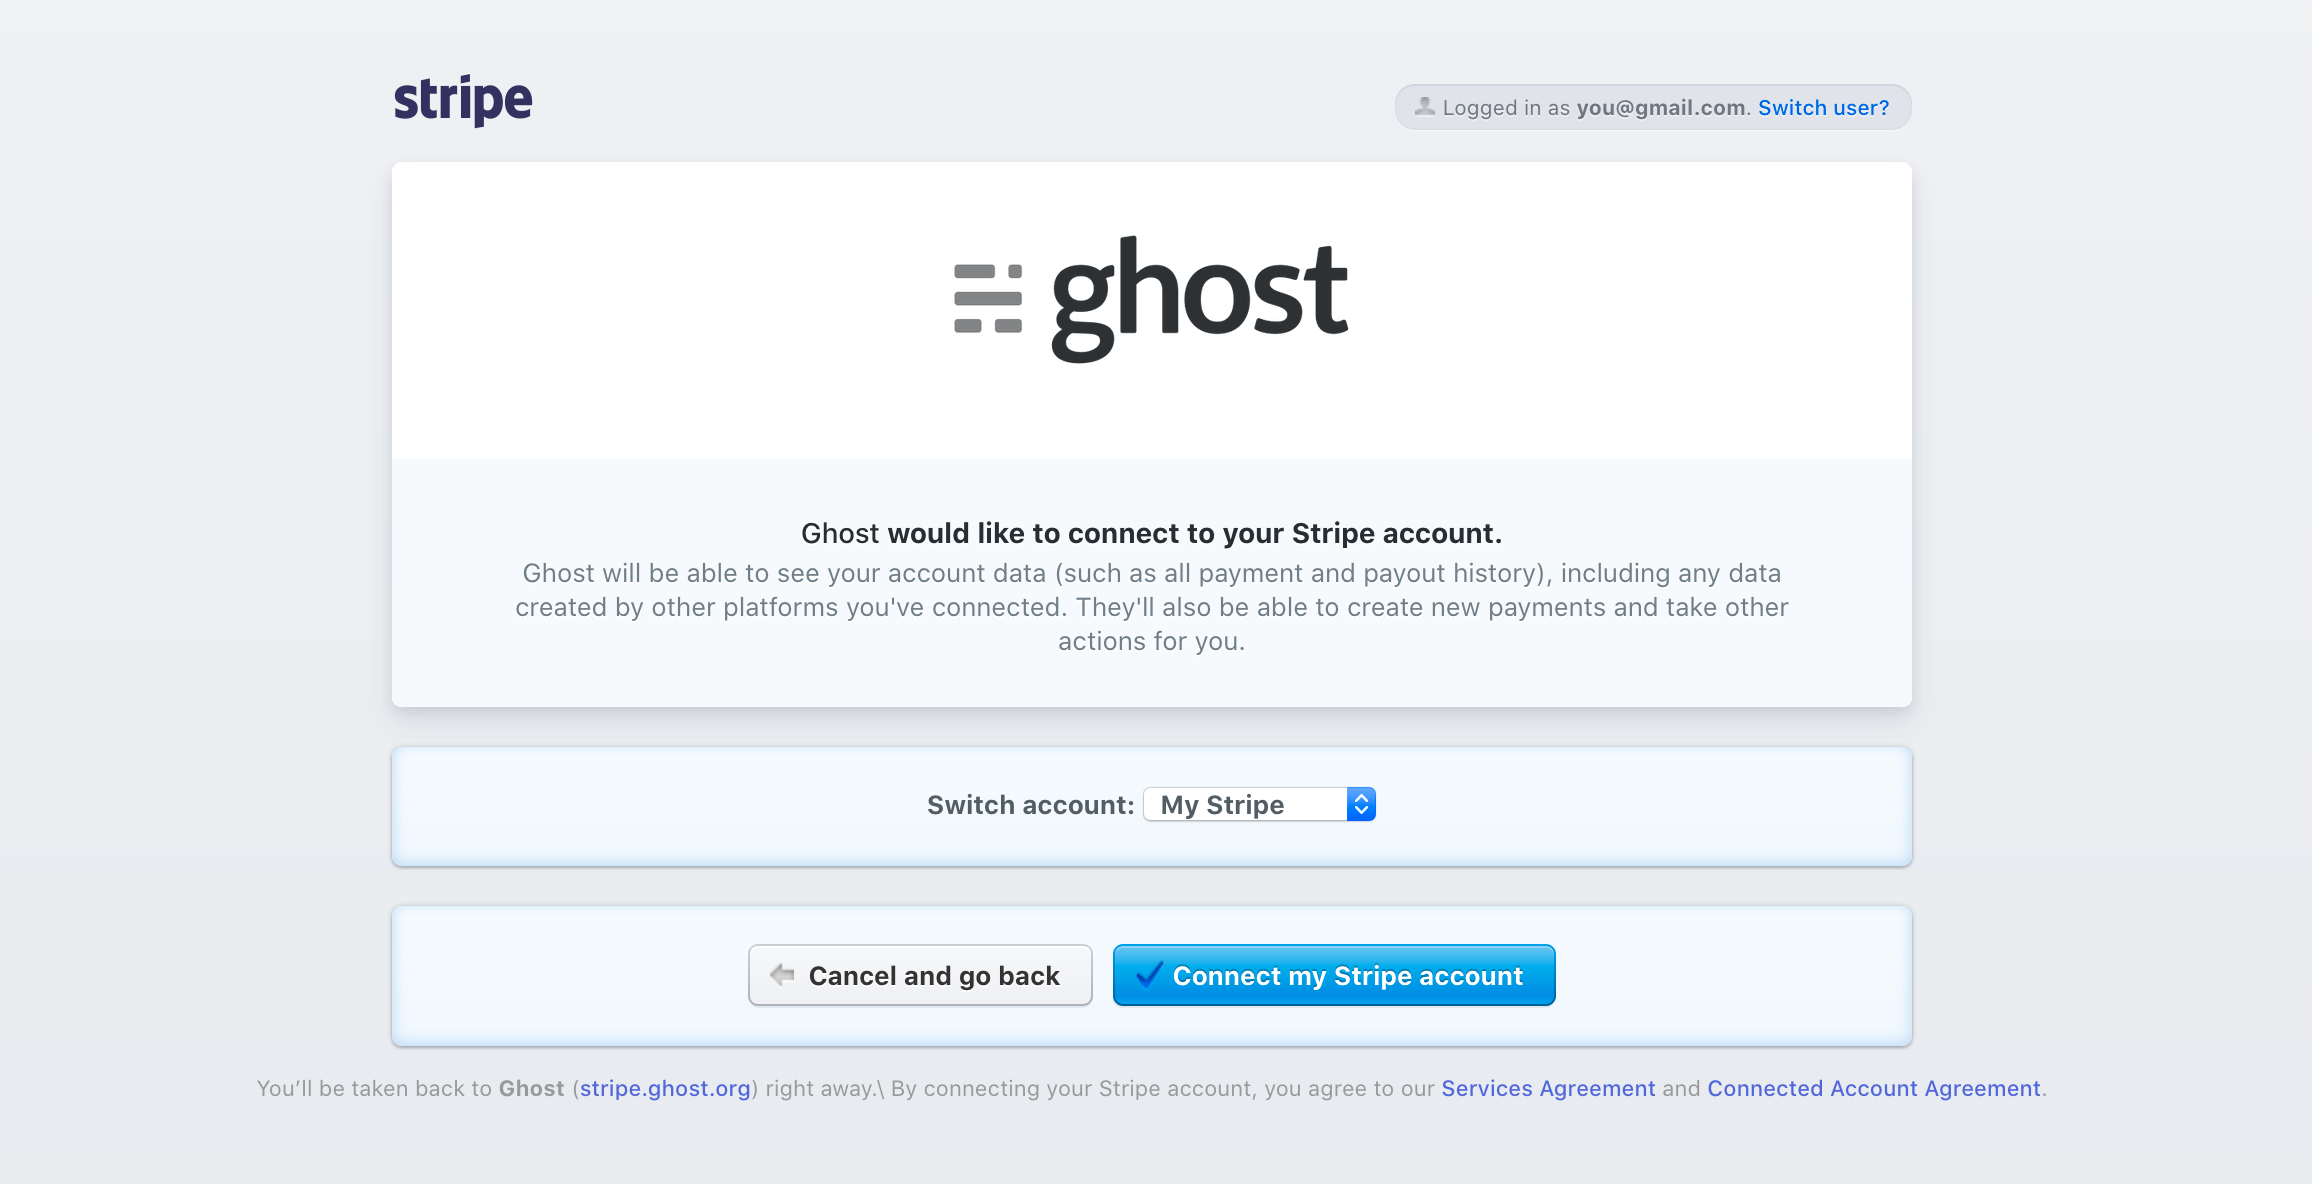
Finally, you will see a confirmation screen that your secure key has been successfully generated.

Click the final blue button to copy the Stripe Connect key, and return to Ghost Admin to paste the key into the provided box. Once you save your settings, your Stripe account will be connected to Ghost.
Create pricing plans
Once your account is connected, use the subscription pricing section to create pricing plans. Ghost gives you the option to create a monthly and a yearly subscription, to allow you to benefit from a sustainable recurring revenue business model.
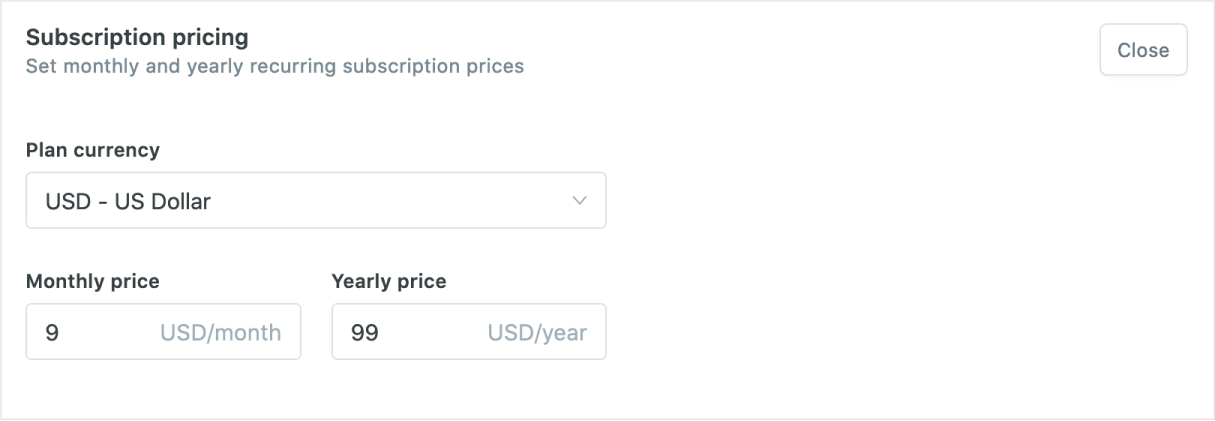
When you enter your pricing and currency in Ghost, those plans are automatically created in Stripe for you. If you decide to change your pricing for any reason, simply change it in Ghost and the rest will happen in Stripe automatically.
Upload a members enabled theme
It's important that your Ghost site allows visitors to your site to sign up, sign in and subscribe to paid plans. This is handled by your site's theme. Here's how to get started with a members-enabled theme.
Pre-built members themes
We've released a purpose-built members theme called Lyra, which is available for anyone to use:
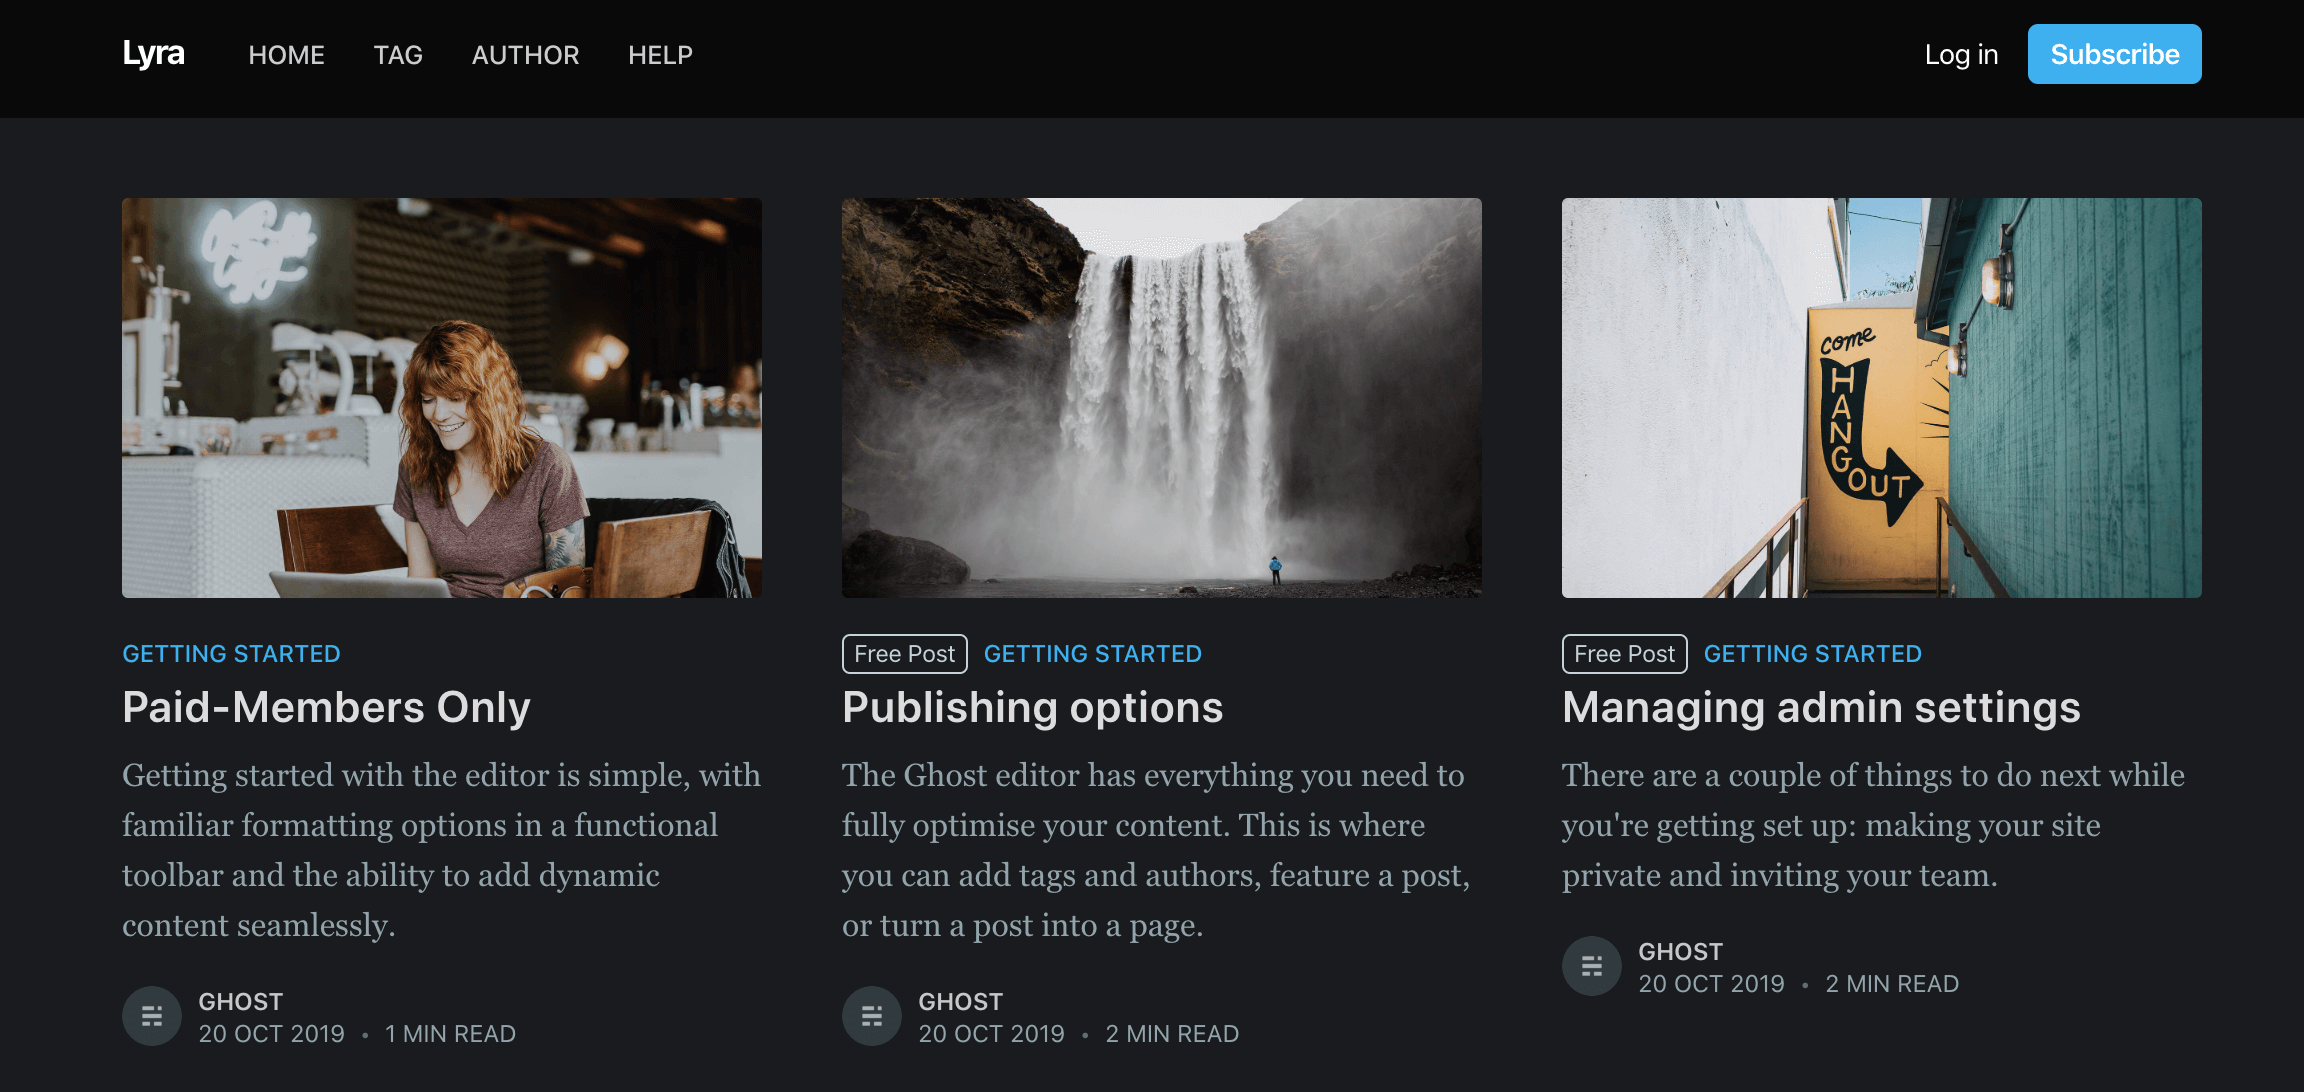
This theme can be installed exactly as it is to support all of the features in members, so you can get started right away.
Download the theme here, then follow these two steps to install it on your Ghost site:
- Download the theme as a
.zipfile and head to the design settings menu in your site's admin to upload it as your active theme. - Within the download is a
routes.yamlfile. Upload this single file using Routes on the Labs page.

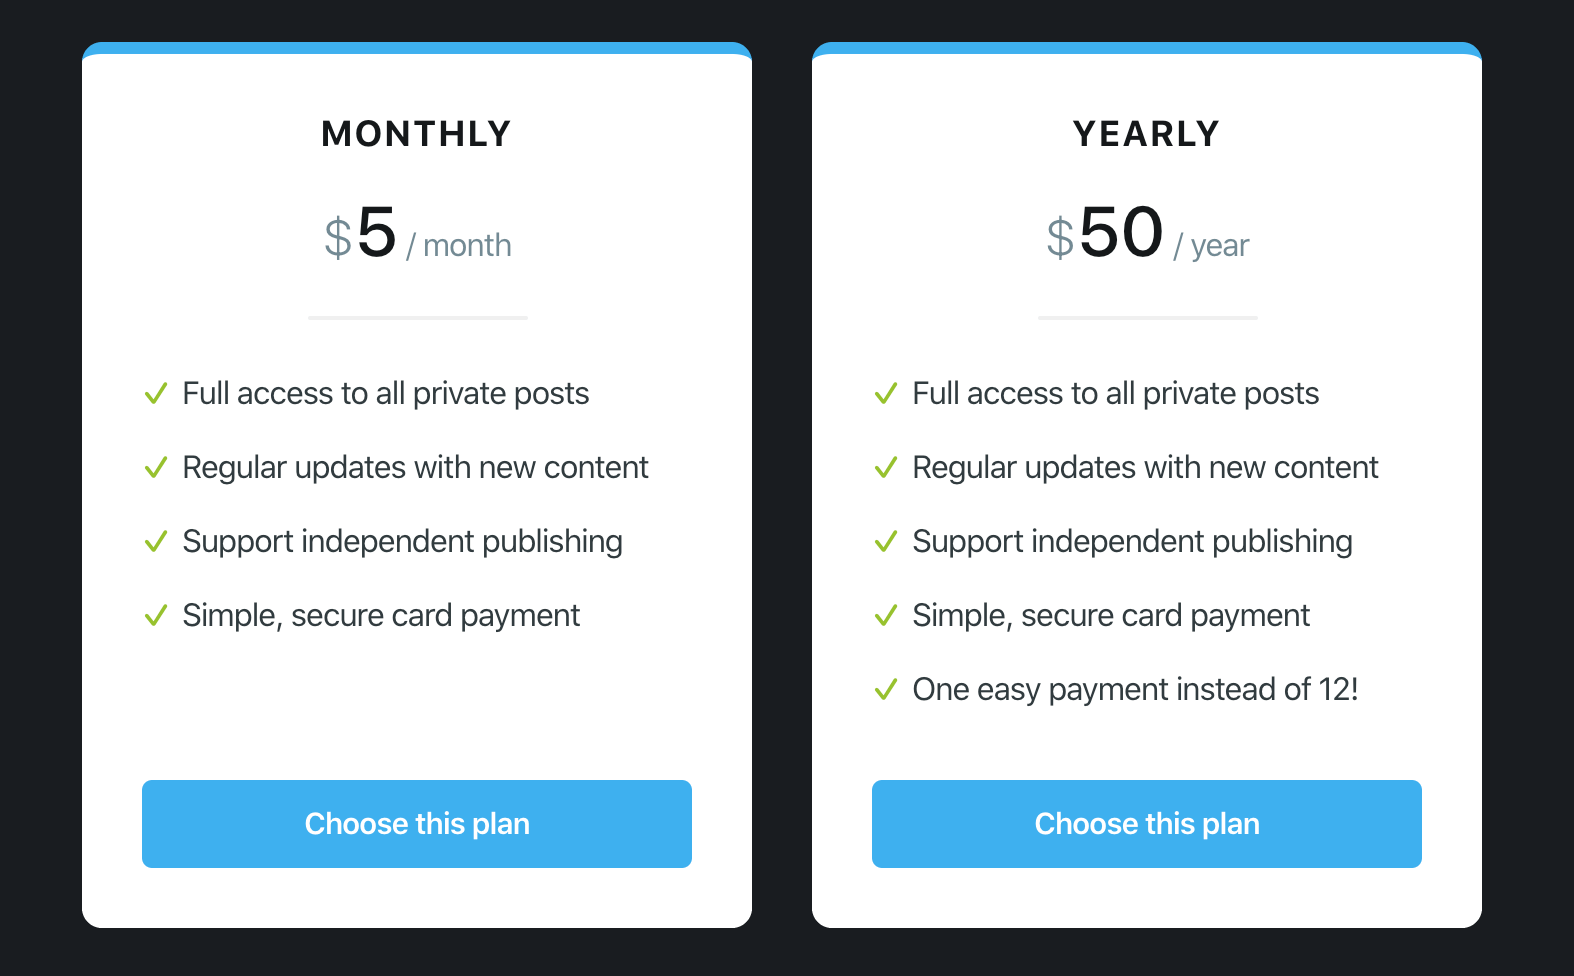
That's it! Your website now fully supports member sign up flows and subscriptions. Content marked as public will appear on your site to all visitors. Members will be able to enter their email to sign up, and once they've done that, they'll be able to support your work via a recurring subscription.
Setting up email newsletters
If you're using Ghost(Pro) email configuration is handled for you so long as you have enabled members on your site. The only thing you need to do is setup your email addresses from the Labs page, in the members settings.
Support and newsletter address
Your support email address is used to send member login emails and is also the public email address that you can share on your site, so your members can contact you for help with their account.
Your newsletter email address is what your newsletter posts are sent from, and can optionally be a different address to your support address.
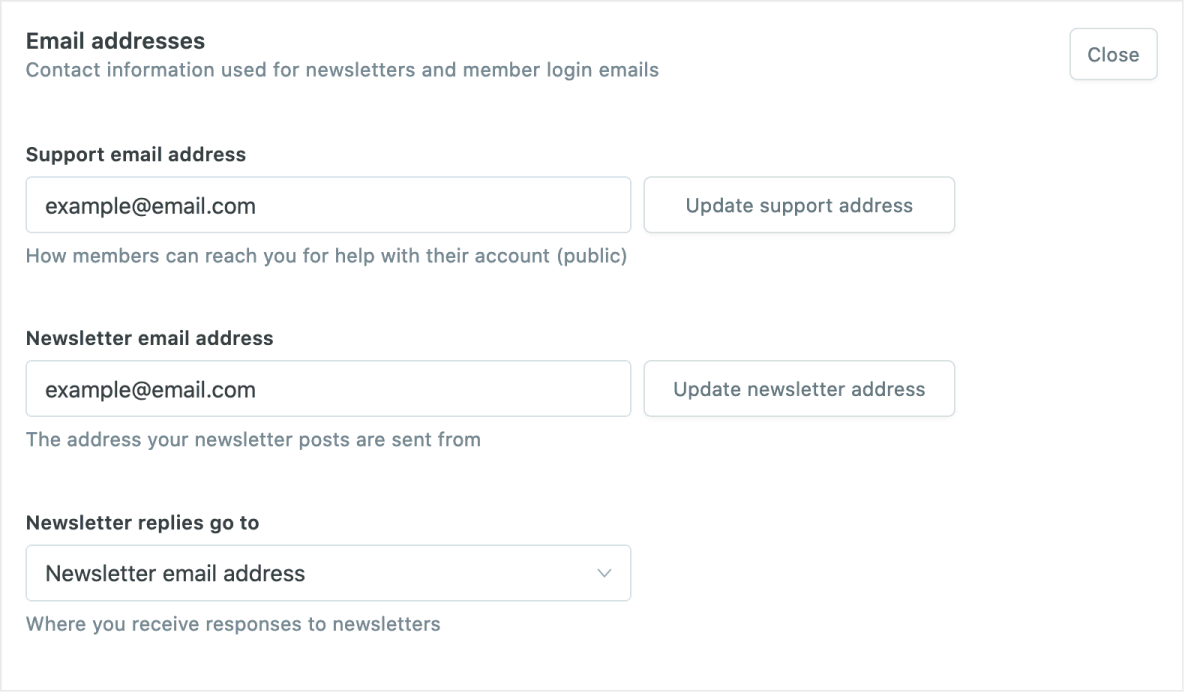
To change your email addresses, enter an email address you own, then click the confirmation link that is delivered to your inbox.
The final step is to decide which of the two emails will be your reply address, when your members hit reply on your email newsletters. Once this is configured, you're all set to start sending emails.
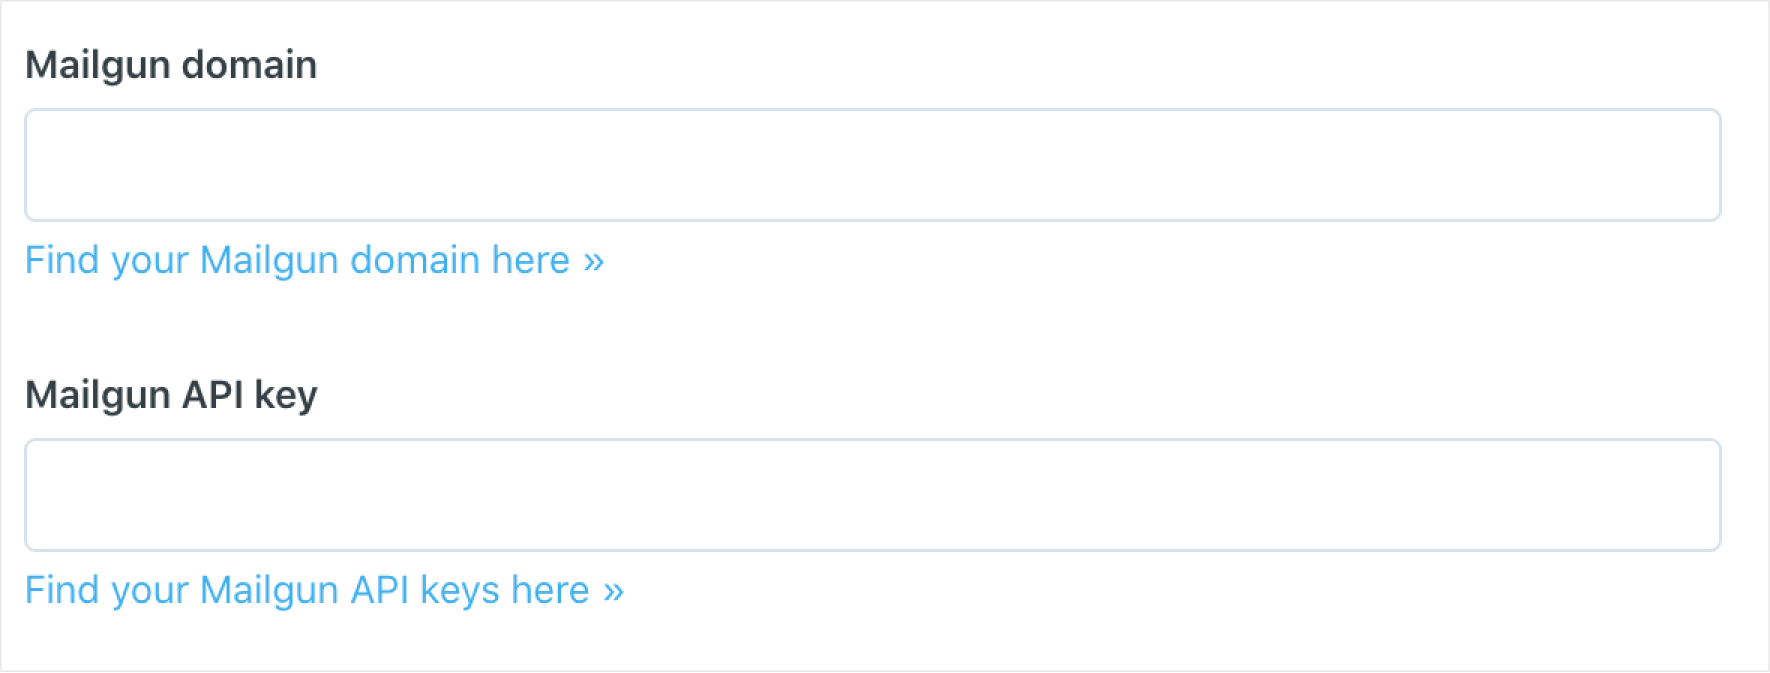
Self-hosted
Self-hosted Ghost installs can configure bulk email by entering Mailgun API keys from the Members settings in Labs.
Note: Delivering bulk email newsletters can not be done with basic SMTP. A bulk mail provider is a requirement to reliably deliver bulk mail. At present, Mailgun is the only supported bulk email provider. Mailgun is free for up to 600 emails per month, and has very reasonable pricing beyond that. More info here